WaterfallOne's permissions system gives you granular control over who can see, create, and modify data across your account. With custom roles, per-asset overrides, and individual permission toggles, you can tailor access for every team member, from full-access controllers to view-only analysts.
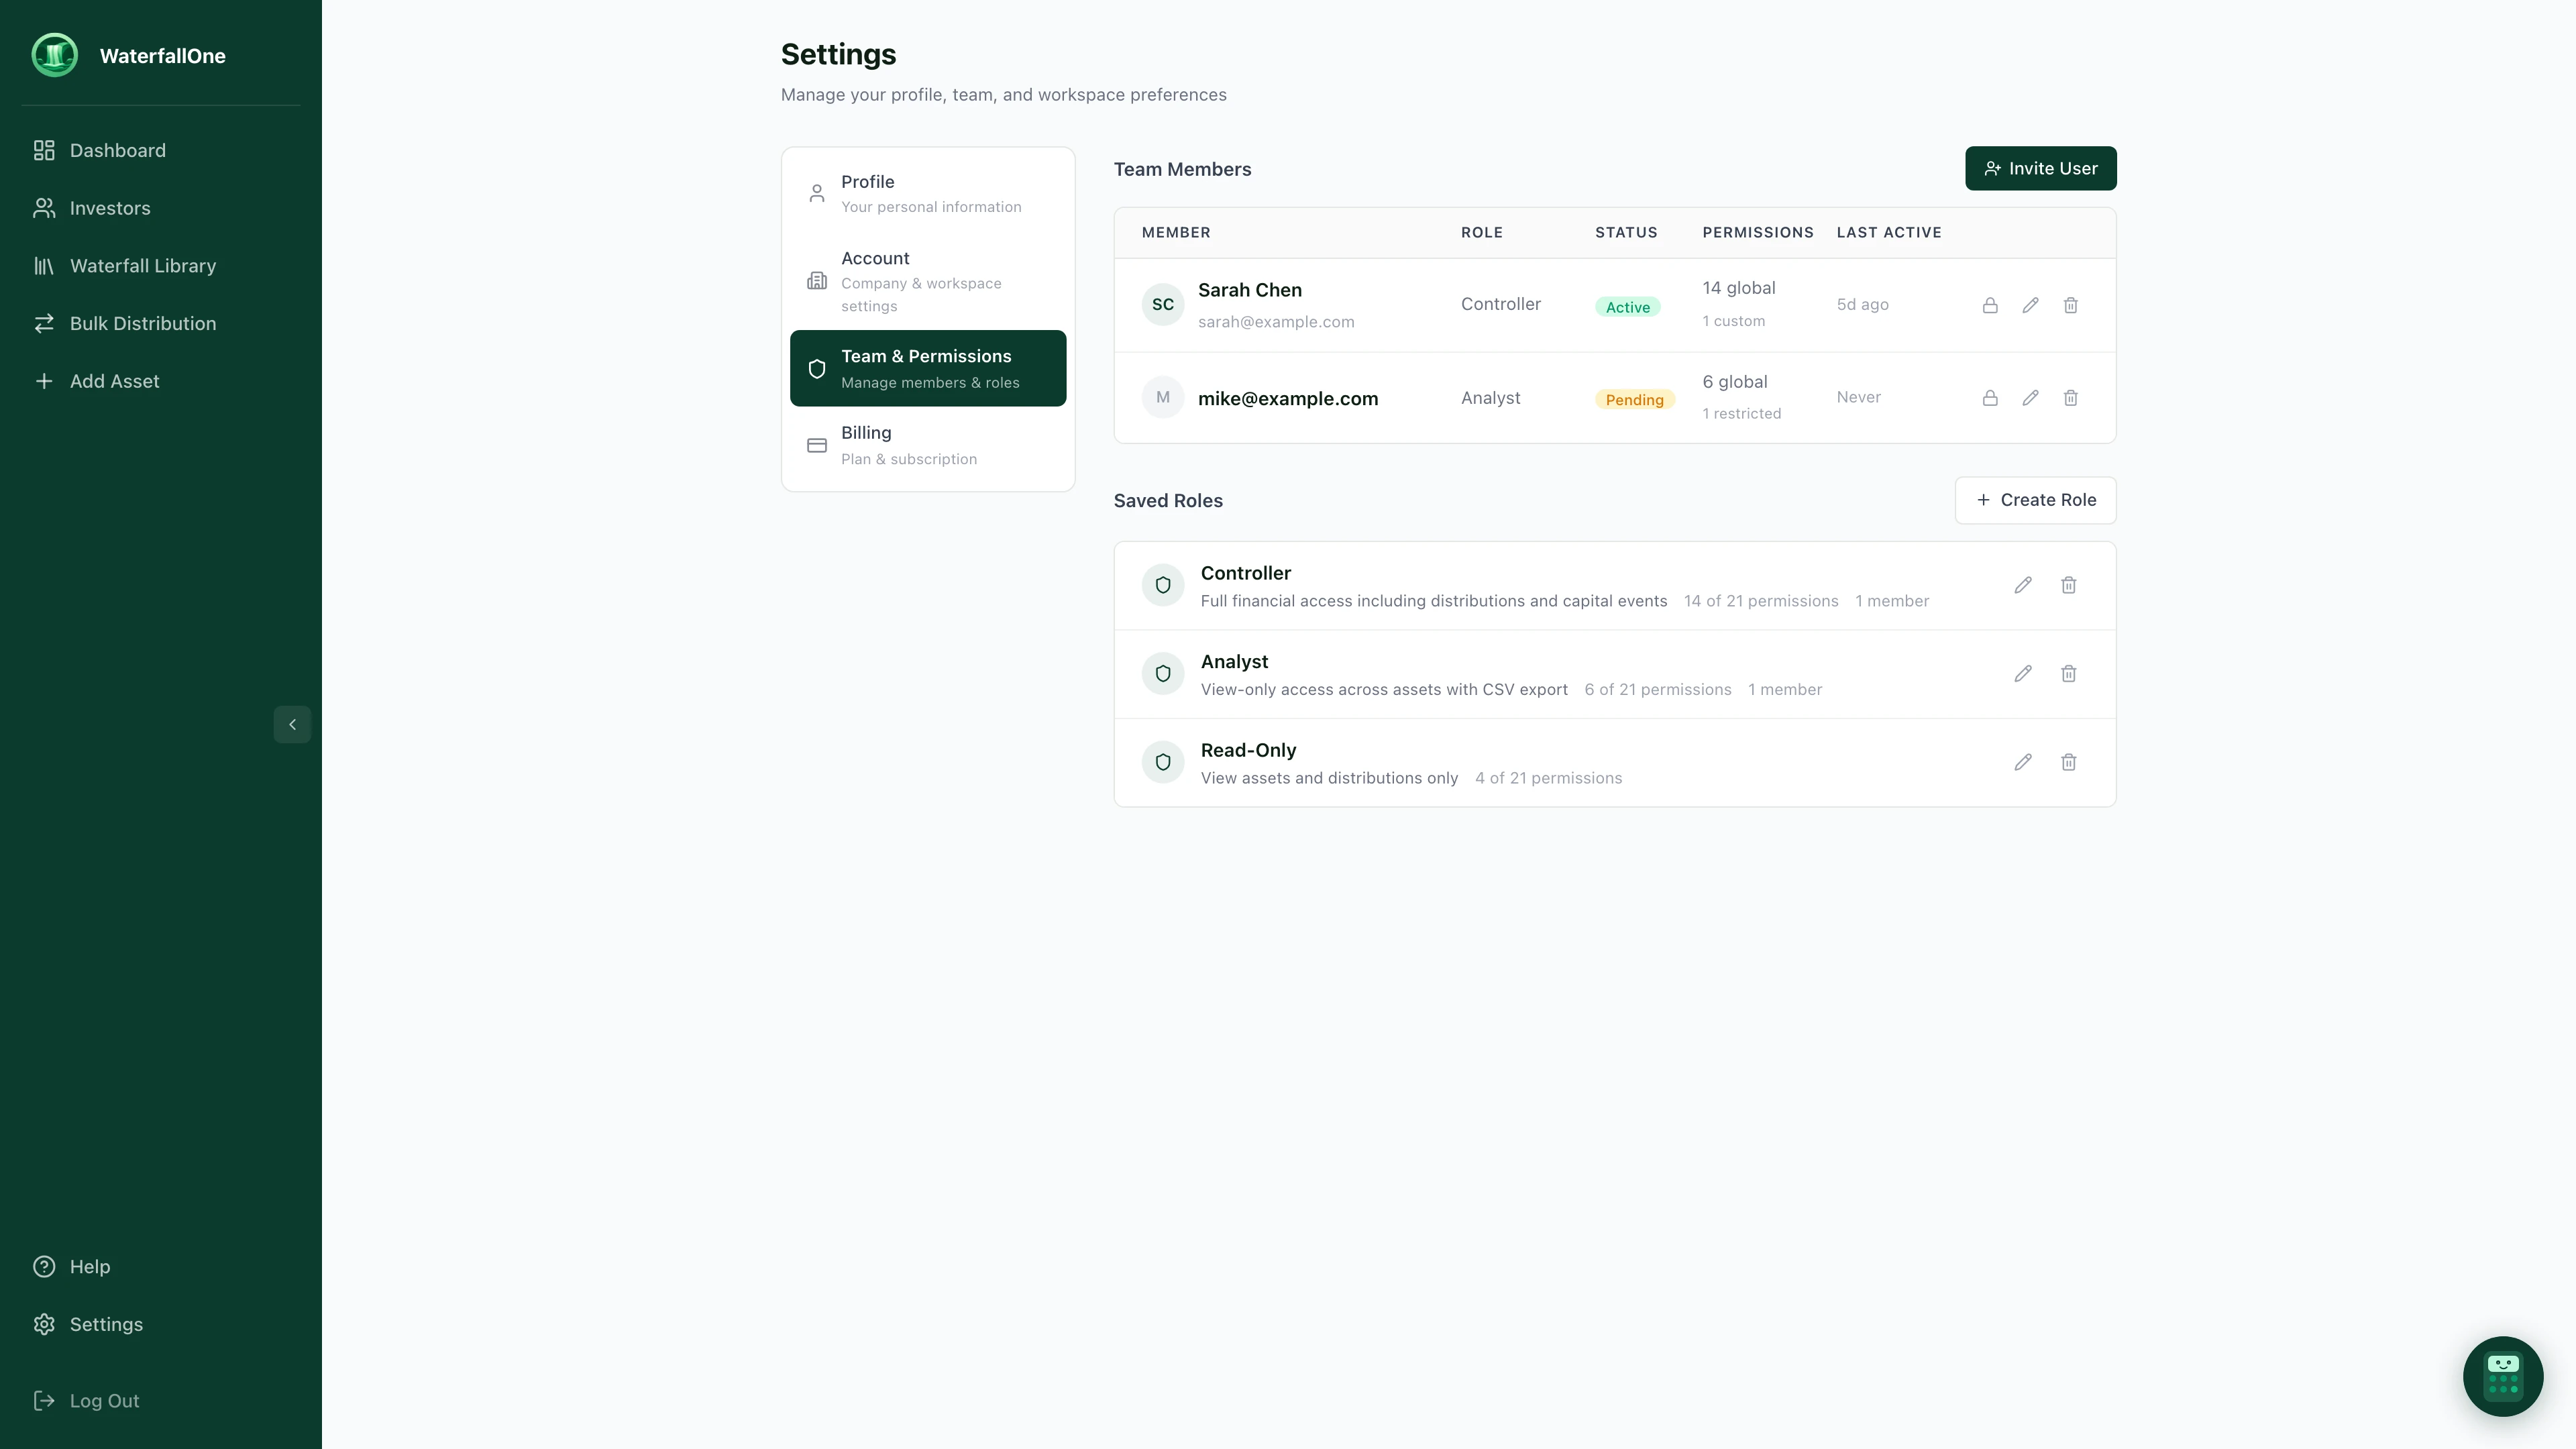
Settings, Team & Permissions. Manage team members, assign roles, and create custom roles.
How Permissions Work
Permissions in WaterfallOne resolve across three layers. The system checks each layer in order, so you can set broad defaults and then override them where needed:
- Global Permissions: The baseline for every team member. These apply across all assets unless overridden.
- Custom Roles: Reusable permission templates you can assign to team members. A role sets a specific combination of global permissions.
- Per-Asset Overrides: Fine-grained exceptions on individual assets. For example, a team member might have global distribution access but be restricted from creating distributions on one specific asset.
Permission Categories
WaterfallOne organizes permissions into seven groups that map to the core areas of the product:
| Category | Permissions | What It Controls |
|---|---|---|
| Assets | View, Create, Edit, Delete | Ability to see, create, modify, or remove investment assets |
| Investors | View, View PII, Edit, Remove | Investor records, including sensitive data like tax IDs and emails |
| Distributions | View, Create, Finalize, Void | Running, reviewing, locking, and voiding distributions |
| Waterfalls | View, Edit, Delete | Waterfall structure configuration and tier setup |
| Capital Events | View, Record | Contributions, reinvestments, and capital adjustments |
| Reports | Export CSV, Export PDF | Data exports and report generation |
| Account | Manage Team, Manage Billing | Inviting members, editing roles, and subscription settings |
Each permission is independent. You can grant an analyst the ability to export CSV reports without giving them access to create distributions or view investor PII.
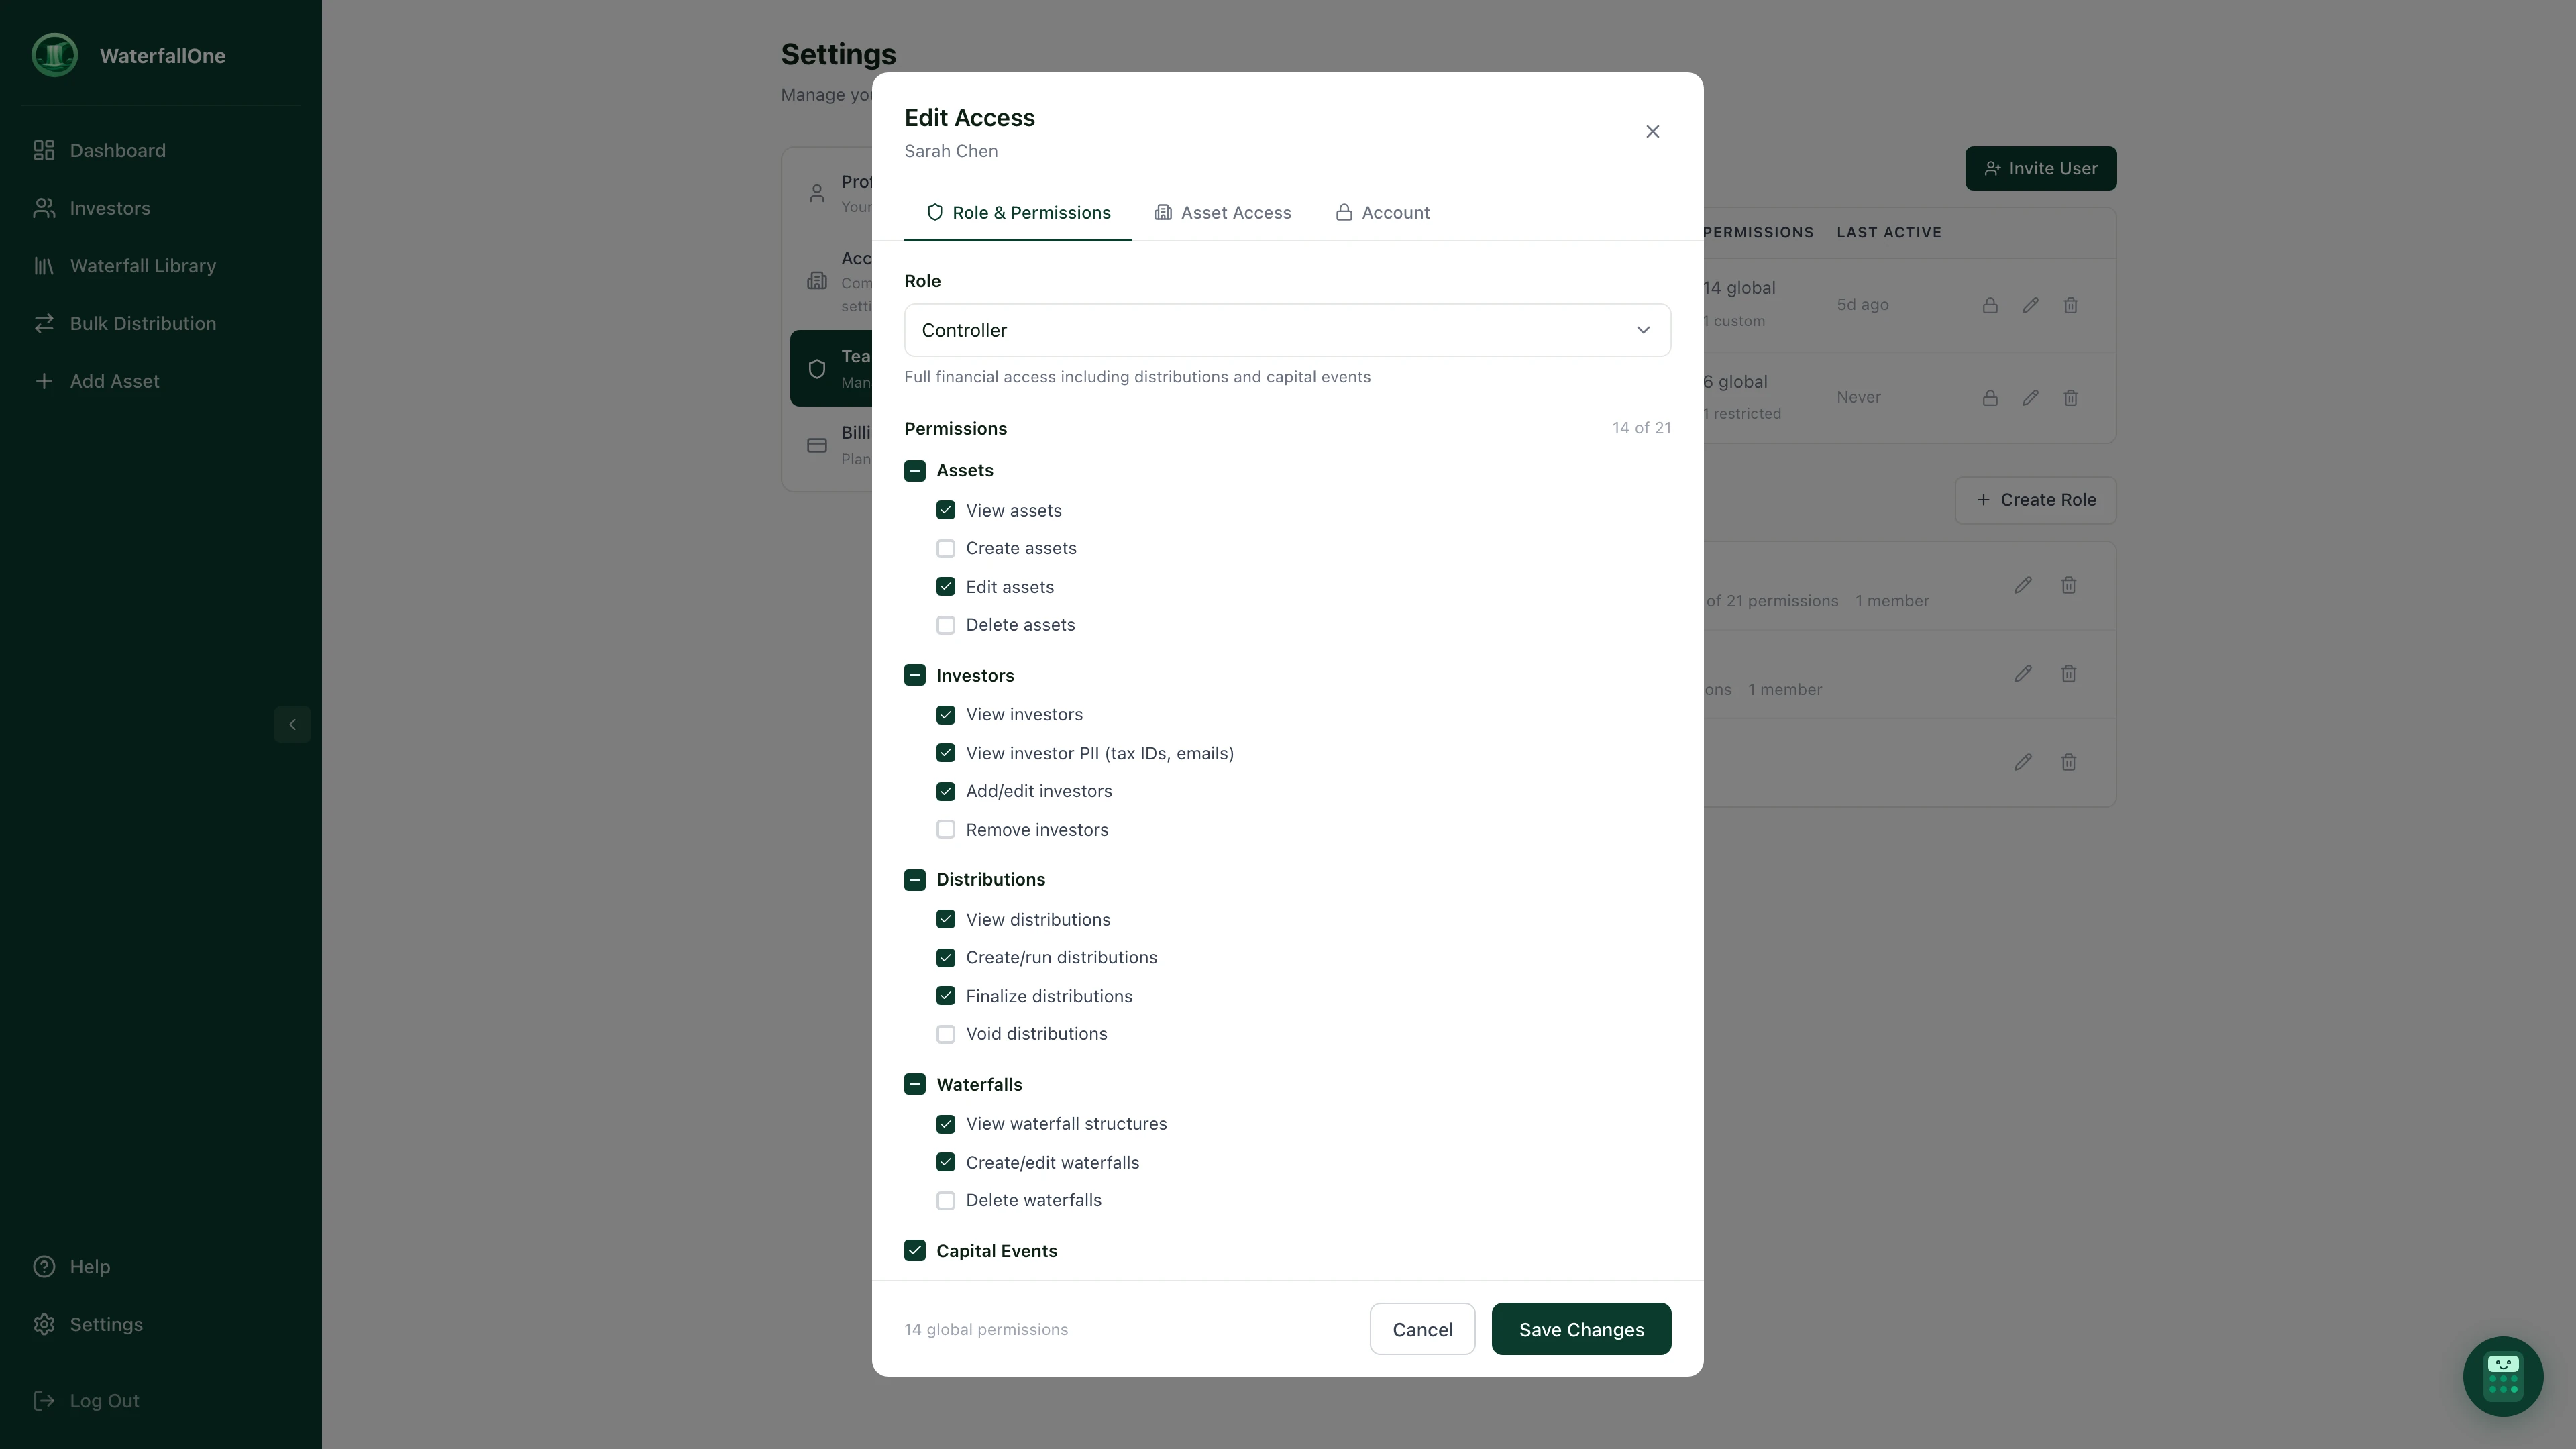
The Role & Permissions tab. Assign a saved role or toggle individual permissions across every category.
Custom Roles
Roles are reusable permission templates. Instead of configuring permissions from scratch for every team member, create a role once and assign it to anyone who needs that level of access.
WaterfallOne includes three built-in roles to get you started:
- Controller: Full financial access. Can create and finalize distributions, record capital events, manage team members, and edit assets.
- Analyst: View-only access with CSV export. Can see all data and pull reports, but cannot create or modify anything.
- Read-Only: Minimal access. Can view assets and distributions but nothing else.
You can also create your own roles with any combination of the 21 permissions. Roles are managed from the Saved Roles section in Settings.
Per-Asset Access Control
Sometimes a team member needs different access levels on different assets. Per-asset overrides handle this. For each team member, you can:
- Enable or disable access to individual assets entirely. If an asset is disabled for a member, they cannot see it at all.
- Override specific permissions on a per-asset basis. A member might have global distribution access but be restricted from finalizing distributions on a particular asset.
The permission resolution logic is straightforward: if an asset is disabled, the answer is always no. If an asset has a specific override for a permission, that override wins. Otherwise, the global permission applies.
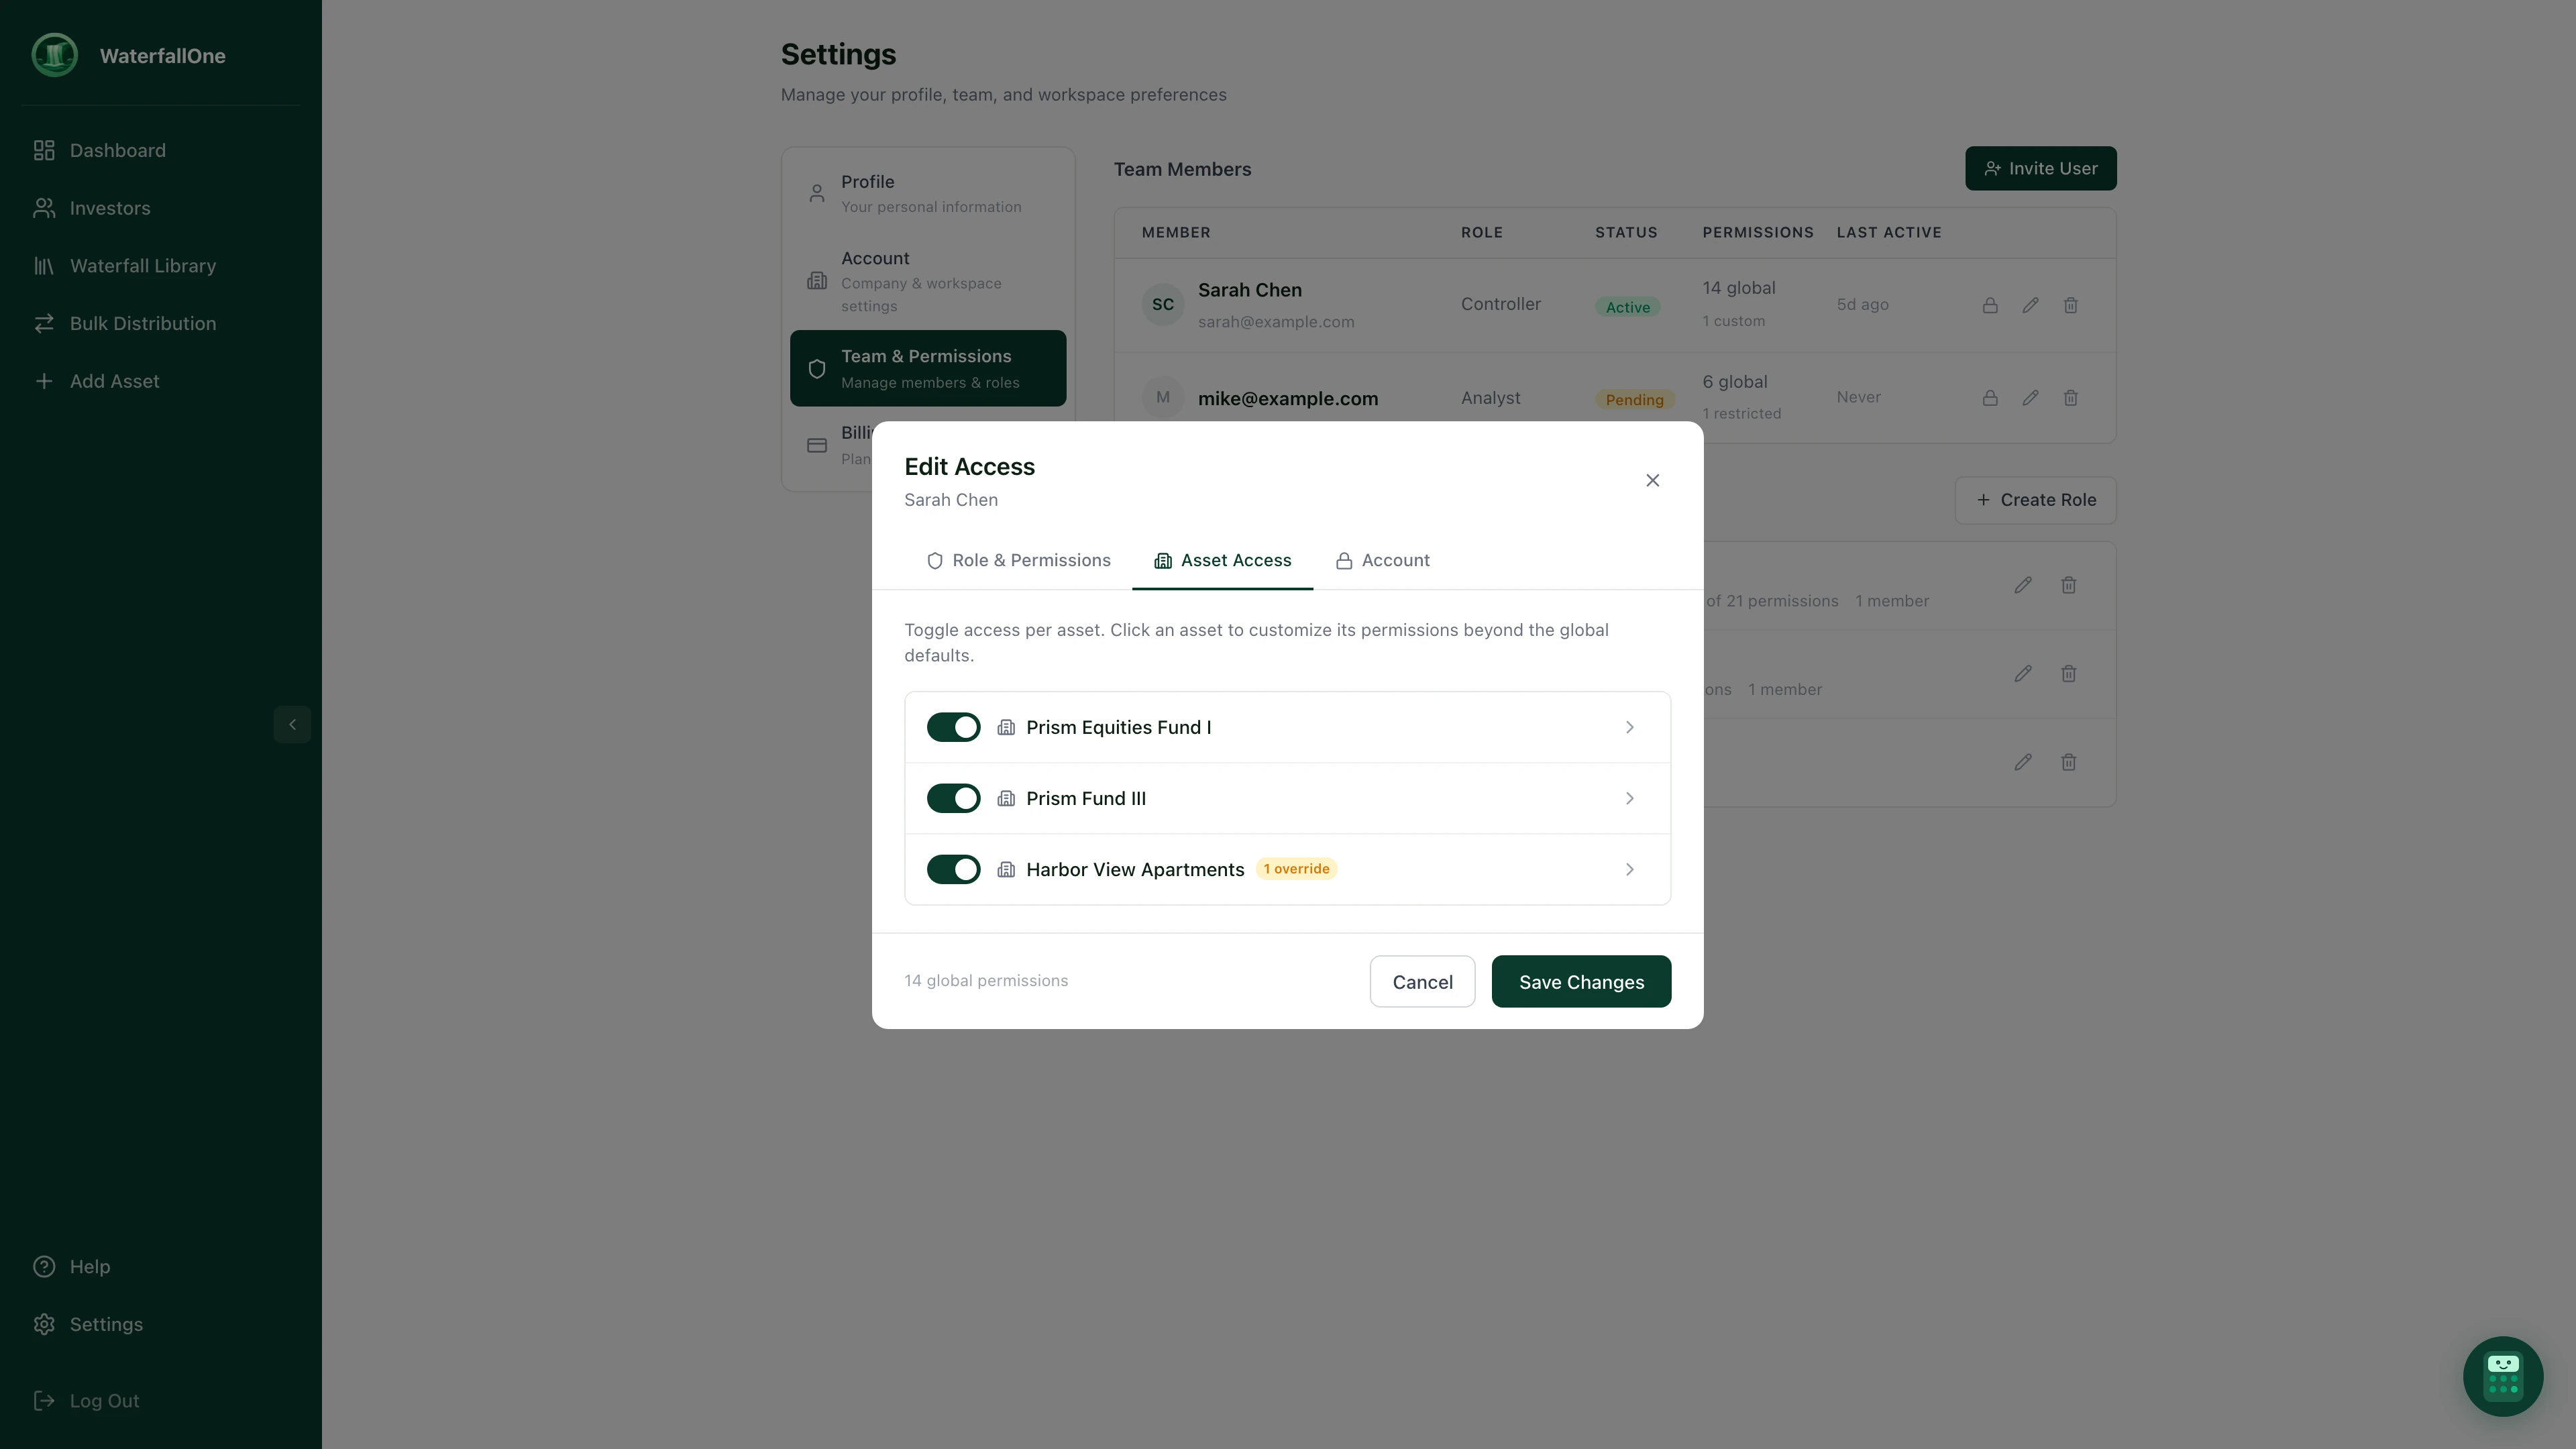
The Asset Access tab. Toggle access per asset, and click into any asset to set permission overrides.
Member Status and Lifecycle
Each team member has a status that controls their access:
- Active: The member has accepted their invitation and can access the account based on their permissions.
- Pending: An invitation has been sent but not yet accepted. The member's permissions are pre-configured and ready for when they join.
- Locked: Access is temporarily suspended. The member's permissions and data are preserved, but they cannot log in. Useful for temporary suspensions or leave.
- Revoked: Access is permanently removed. The member can no longer access the account.
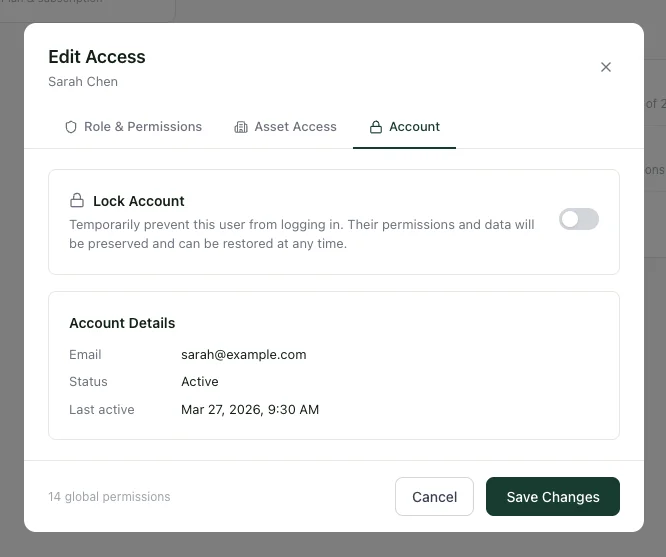
The Account tab. Lock a user temporarily or view their account details and last active date.
Setting Up Permissions
To configure permissions for your team:
- Navigate to Settings from the sidebar
- The Team Members section shows everyone on your account with their role, status, and permission count
- Click Edit on any member to open the permissions modal
- Assign a saved role, or configure permissions individually using the checklist
- Optionally, scroll to Asset Access to enable/disable specific assets or set per-asset overrides
- Click Save to apply changes immediately
To invite a new member, click the Invite button, enter their email, and assign permissions before sending. They'll have the right access the moment they accept.
Best Practices
- Start with roles, then override. Assign a built-in or custom role first, then use per-asset overrides only where needed. This keeps your permissions manageable.
- Separate PII access. The "View Investor PII" permission is separate from general investor viewing. Only grant PII access to team members who need tax IDs and contact details.
- Use Lock instead of Revoke for temporary situations. Locking preserves the member's permission configuration so you can restore access quickly.
- Audit your permissions regularly. The team table shows active permission counts and asset restrictions at a glance, making it easy to spot over-permissioned accounts.
Ready to try it?
Start free. No credit card required.